
Jim Varnum
March 27, 2007
In early 2007, I decided to build a simple fiddle similar in design to one I saw in a book titled: "Making Folk Instruments in Wood" by (author). I knew I wanted to build an instrument that had a simpler shape than a conventional violin so this one appealed to me. The book did not contain detailed plans and my version differed from the author's in many ways ... but that's the fun of building things.
Here is the result of that experiment.
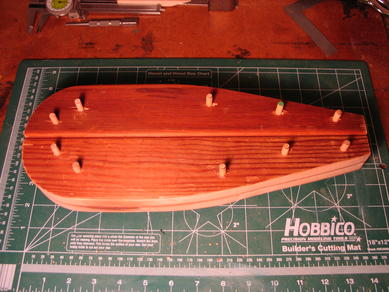
First, I decided to make a simple "Appalachian-style" mount fiddle. In my travel-guitar project, I learned that building the body without using a mold was not the best idea. Here I decided to create a mold. I transferred the shape of the fiddle body onto some scrap wood and cut it out.
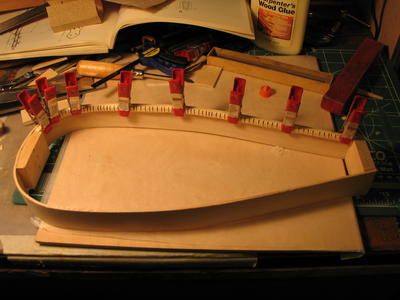
The finished molds were then drilled an wood dowels were glued in place. These dowels would be used (in conjuction with rubber bands and clamps) to secure the steamed sides to the mold.
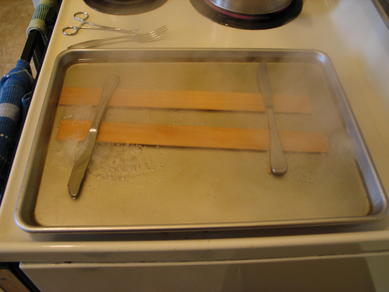
The sides were steamed (boiled) in exactly the same fashion as the travel guitar sides and like other projects, the bass wood was used for the body.
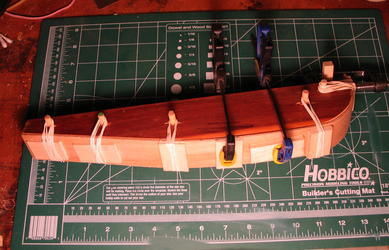
When the wood soften (after about 1/2 an hour) the sides were formed onto the molds and secured with rubber bands and clamps. The small wood blocks were used to distribute the clamping forces and to prevent damage to the soft sides.
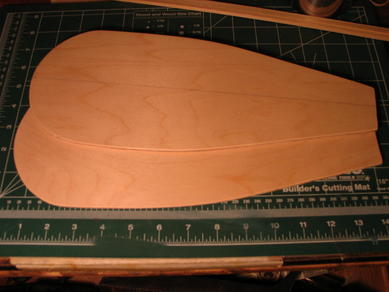
Using the same template used to make the molds, the top and back were marked and cut. Bass plywood was used for these parts.
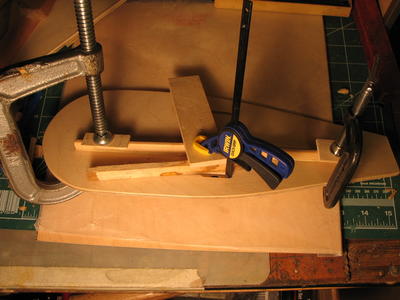
The sides were left on the molds for about 4 days. When they were sufficiently dried, they were assmbled to the tail and neck blocks. In this project, I decided to take the more conventional approach of attaching the kerfing to the sides rather than the top and back as I did with the travel guitar.
All violins contain a piece of wood stock glued to the underside of the top. This piece is called a bass bar. It is tapered (in height) at the ends. The tallest part of the bar is located directly under one "foot" of the bridge
With the kerfing in place, the assembled sides were glued to the back. The thin piece of wood running lengthwise along the centerline was temporarily installed to "stretch" the body a bit so that the sides better matched the shape of the back. Once clamped, it was removed.
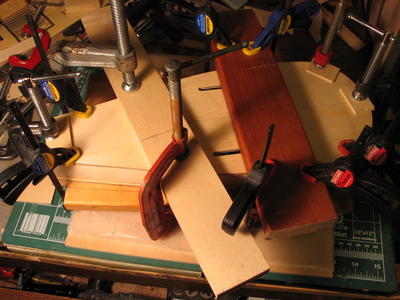
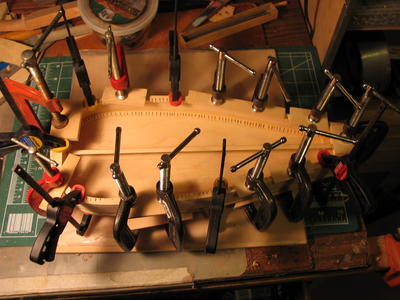
The top was then glued and clamped in place. Just enough clamp pressure was used to provide a solid clean seal between the top and sides. Too much force would cause the sides to bow.
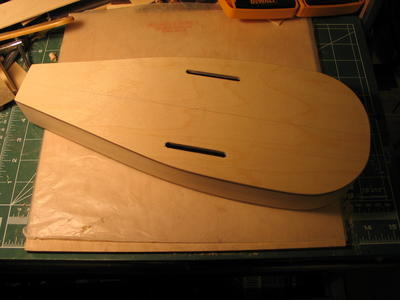
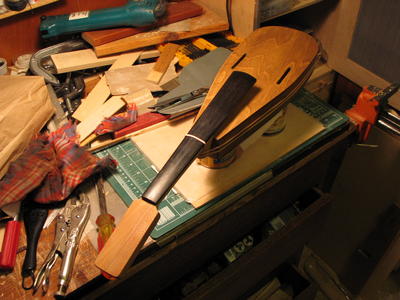
The body is complete and ready for the rest of the fiddle to be completed and assembled. Note the simple straight line "F-holes". These were made by marking and rough cutting the slots with a coping saw and then hand filed and sanded to the finished shape.
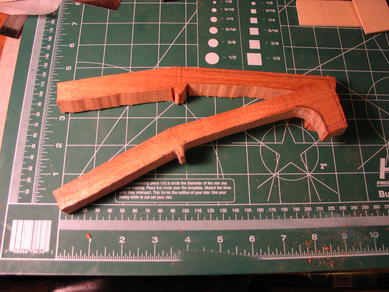
The neck was cut from 2 pieces of mahogony (left over from the travel guitar project). The shape was drawn directly on the wood and the shape was cut with a coping saw.
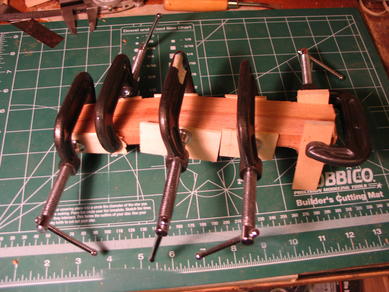
The 2 halves were glued and clamped. Note that the headstock is not shaped like a conventional violin headstock. Instead, it very similar to a guitar's.
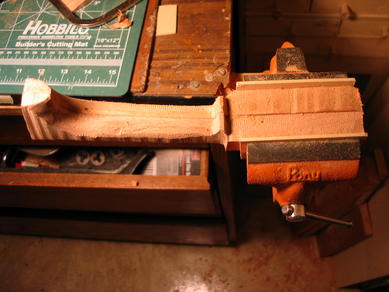
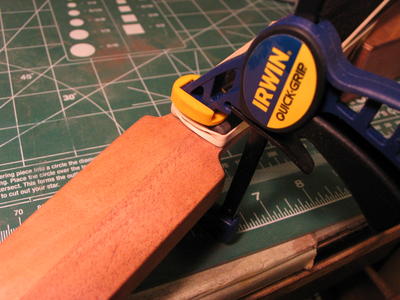
The neck is was clamped in a vice for rou shaping with chisels, and files. Care was taken to ensure symmetry between each side of the neck.
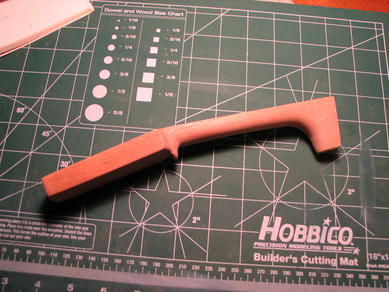
The finished neck, ready for attachment to the body.
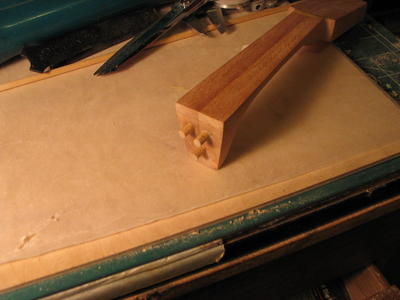
In a radical departure from traditional violin making techniques, I decided to attach the neck to the body by 3 pins, pressed and glued into the "heel" of the neck.
3 holes were drillend into the neck block of the fiddle body and the neck pins were glued and pressed into them. This proved to be a simple and effective way to attach the neck.
The nut was cut and filed to shape and glued to the neck. At this point in the construction process, the tail pin was also installed.
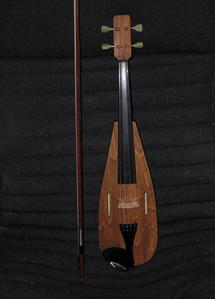
The fiddle was finally assembled with standard guitar tuners, a bridge, tail, and chin rest
The body and neck were finished with several thin coats of urethane varnish that were rubbed into the instrument using a rag. This is similar in principle to "French Polishing".One important part of every violin is the sound post. It is a 1/4" piece of dowel fitted into the body (via the sound hole) and sandwiched between the top and back of the instrument. This part is used to improve treble response and acoustically couples the top and back.
I was most pleased and somewhat surprised by the sound of the fiddle. Naturally, the sound will never rival a proper violin made by a knowlegable craftsman but it did sound balanced with reasonable volume.
This was truly a fun project with lots of room for experimentation.
Enjoy and have fun.