Jim Varnum
March 25, 2007
My work requires that I travel several times each year. Most of this time is spent on oceanographic research vessels and each trip lasts about a month. I would like to bring a guitar but have had problems traveling with one in the past. My favorite guitar was once damaged, badly, by Northwest Airlines.
I began searching for a small travel guitar and found that most simply reduced the size of the body but not the scale length. This results in a guitar with reduced volume and sound quality that still won't fit in the overhead compartment of a small airline. I was willing to make sacrifices in the sound department but not at the risk of having to "check" the guitar as luggage.
I decided to try my hand at building a travel guitar using only wood I had on hand (I did later decide to purchase wood for the neck). Here is documented the result.
The sides, back and top were made from bass wood. Though this is not the wood normally used to make a musical instrument, it is easy to work with.
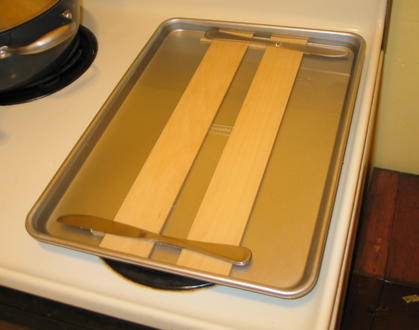
The wood was steamed (actually boiled) in a heavy-duty baking pan for about half an hour. The sides are raised off the bottom of the pan by 2 small pieces of wood and weighted with 2 table knives.
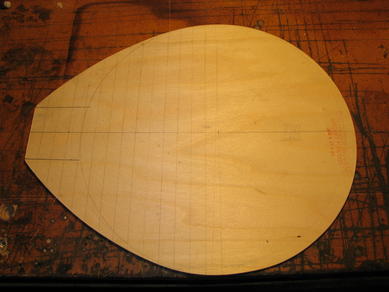
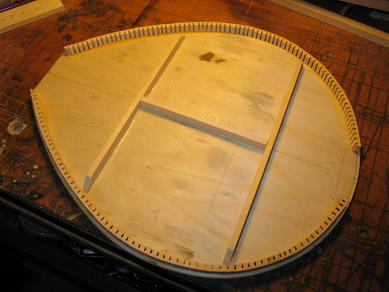
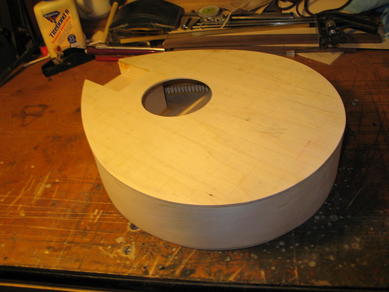
I chose a simple teardrop shape body for the guitar. The top and back were cut from bass wood ply for maximum strength.

In conventional guitar building, a pair of molds are used to form the steamed sides. I decided to use a cake pan as the mold. While this saved time, it was quite difficult to get the shape just right to match the top and back. In hindsight, I would build a set of proper molds if I decided to build another guitar.
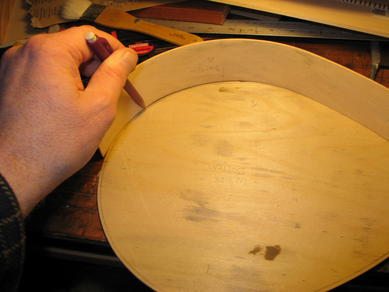
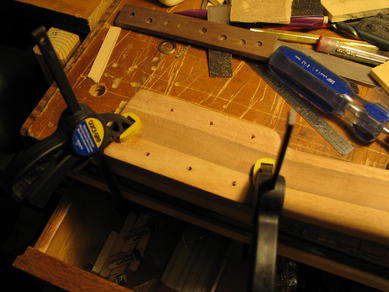
In another departure from traditional guitar building techniques, I decided to glue the kerfing to the top and back rather than the sides. The kerfing is a slotted strip of wood that is glued at the seam between the top (or back) and the sides of the guitar to create greater bonding area and therefore a stronger body. Here I am transferring the shape of the sides to the back of the guitar as a guide for the kerfing. Note the stains in the wood .... further proof that the guitar was made from "available" wood.
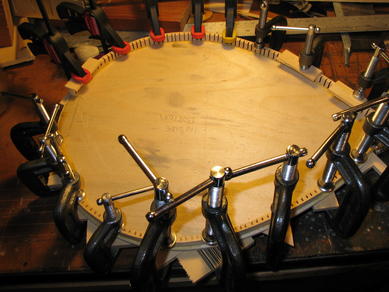
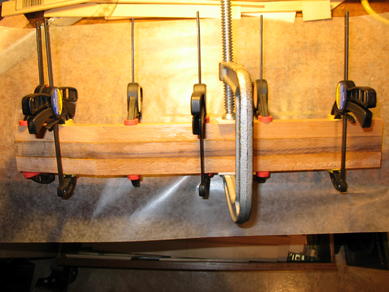
Using the guide lines transferred from the sides, the kerfing was glued and clamped to the back. Note that there is a "gap" at the tail end of the body. A tail block will be secured in it's place. The kerfing is made by simply slotting a strip of wood. The slots cut about 90% of the way through the wood leaving a piece that is very flexible and easily manipulated into the desired shape.
With the kerfing secured, a simple back brace was glued in place. The bracing provides strength to the guitar and has an effect on the sound properties of the instrument. Being a small-bodied travel guitar, I was more concerned about the strength value of the bracing.
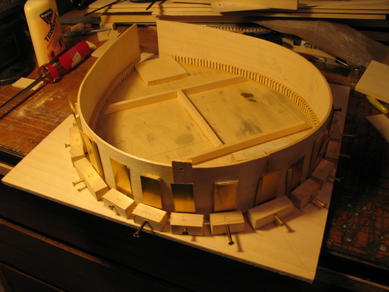
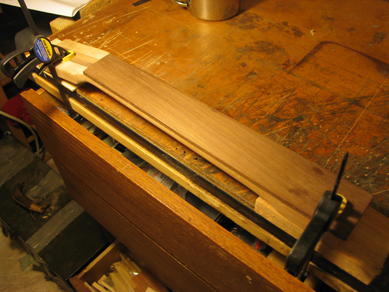
In yet another huge departure from tradition, the sides were bonded to the back using a rather complex clamping arrangement. Each screw acted as a single clamp. To protect the sides and provide greater clamp contact area, I used a piece of wood a some brass stock between the screw ends and the guitar body. This technique worked very well.
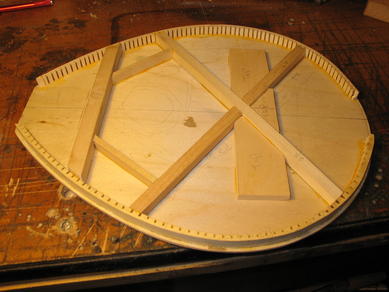
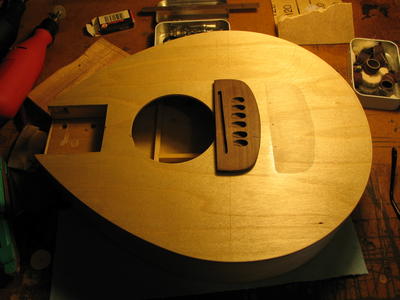
The top was braced using a conventional X-brace pattern. The rectangular piece of wood (actually 3 separate pieces) is called a bridge plate and provides a secure foundation for the bridge. The bracing was made heavier than was probably required but once again, strength was the key concern.
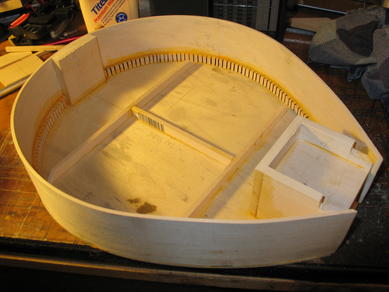
Here the body is ready for the top. A heavy neck block was added to provide a strong anchor for the neck. "Acoustic" guitars are normally fitted with a glued on neck but I decided to use a bolt on neck similar to those used by electric guitars.
Here the body of the guitar has been glued together. There is no fancy binding on the edges though nothing would have prevented me from doing that.
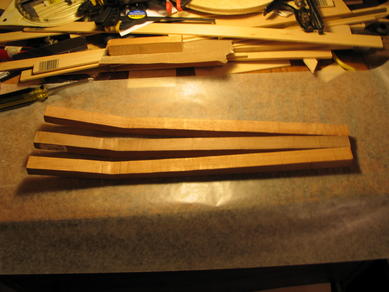
For the neck construction, I began by rough cutting 3 pieces of wood to the desired profile. The middle piece is maple and the 2 outer pieces, mahogony. Once the body of the guitar was finished ... (and turned out better than I thought it might), I decided to purchase the wood for the nech and fretboard.
Here the 3 pieces forming the nech are glued and clamped. I used standard Carpenter's wood glue for the task.
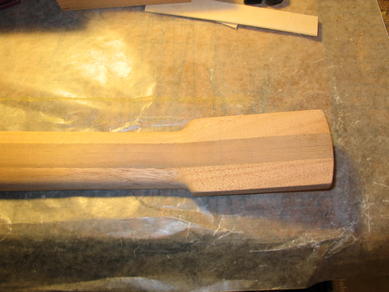
This is the finished neck. The neck was cut with a handsaw (coping saw) and shaped with a file and finally sanded for smoothness. After the neck was finished, a slot was "routed" (actually chiselled) into the fingerboard side of the neck and a piece of steel square stock was set to act as a truss rod. Due to the short scale length of the guitar, I decided to forego the use of an adjustable truss rod and trusted that through proper string guage selection and tensioning, a suitable amount of neck relief could be achieved ... This turned out to be the case.
A piece of rosewood was cut and radiused to 15", then glued to the neck. The fret board radius refers to curve of the fret board that is characteristic of almost all guitars.

A fret saw was used to cut the slots and a small mallet and fret setter were used to set the frets. There are many ways to set frets but this was the simplest. The frets were pre-bent to fit the radius and trimmed and filed.
Small pilot holes were first drilled to act as guides for the final holes. Clamping the headstock so that the face is clamped hard against a piece of hardwood ensures that the wood on the face of the headstock will not "tear" as the drill bit exits.
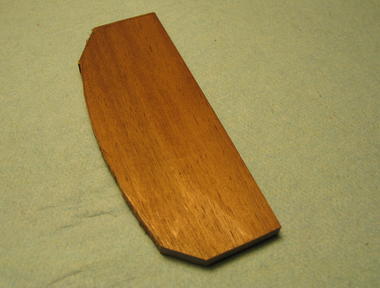
This is the rough cut beginnings of the bridge. An oof-the-shelf bridge would have been desireable but due to the small scale of the guitar, the string spacing of a commercial acoustic guitar bridge was just a little too wide. This bridge is a scaled down version of a popular brand.
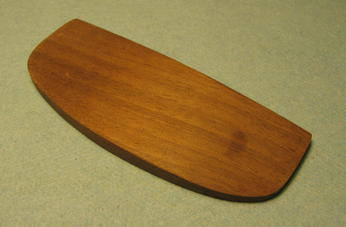
Here the blak has been filed and sanded to it's finished shape. Next, the slot was cut for the saddle and finally, the string wells and holes were drilled.
Once the bridge was finished, it's outline was traced onto the body of the guitar and the guitar's finish was removed to provide better bonding.
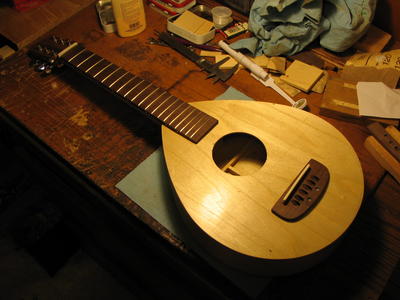
Here the nut, tuning machines, neck body and bridge are assembled and for the first time, the guitar begins to take shape.
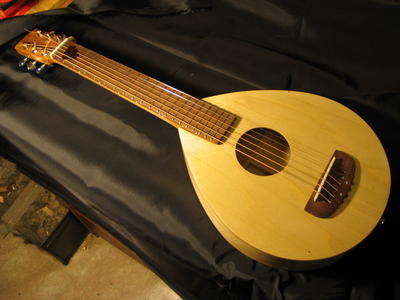
The completed guitar turned out quite well. The body was finished using urethane varnish as was the neck (at the headstock and heel). The backside of the neck was oiled to prevent the friction often associated with urethaned neck. The sound is pretty good for such a small sized guitar and most importantly, it sounds balanced. All of the strings sound like they "belong" to the same instrument and there are no dead spots or booming notes.
If I was to build another guitar, I would stick to more conventional building methods like the use of body molds. It's fun to experiment with alternate ideas but there is a reason that existing techniques have evolved to where they are....It's the best way to do it.
Anyway, it was a fun project and as usual for me, there was no formalized plan. Just cut the sizes and shapes as I go. Of course, one can't play fast and loose with things like fret spacing and neck angle, but fortunately there is a wealth of information on line to help calculate these things.
Try it and have fun.